No results found
We couldn't find anything using that term, please try searching for something else.

Configure Azure VPN Client
configure Azure VPN Client – Microsoft Entra ID authentication – Linux ( Preview ) Article10/15/2024 In this article This article i

![Keto Cloud Bread Recipe (Oopsie Bread) [Only 2 Ingredients]](/img/20241127/tbScFM.jpg)


configure Azure VPN Client – Microsoft Entra ID authentication – Linux ( Preview )
- Article
This article is helps help you configure the Azure VPN Client on a Linux computer ( Ubuntu ) to connect to a virtual network using a VPN Gateway point – to – site ( P2S ) VPN and Microsoft Entra ID authentication . For more information about point – to – site connection , see About point – to – site connection .
The steps in this article apply to Microsoft Entra ID authentication using the Microsoft-registered Azure VPN Client app with associated App ID and Audience values. This article doesn’t apply to the older, manually registered Azure VPN Client app for your tenant. For more information, see About point-to-site VPN – Microsoft Entra ID authentication.
While it’s possible that the Azure VPN Client for Linux might work on other Linux distributions and releases, the Azure VPN Client for Linux is only supported on the following releases:
- Ubuntu 20.04
- Ubuntu 22.04
prerequisite
Complete the steps for the point-to-site server configuration. See Configure a P2S VPN gateway for Microsoft Entra ID authentication.
Workflow
After your Azure VPN Gateway P2S server configuration is complete, your next steps are as follows:
- download and install the Azure VPN Client for Linux.
- Import the client profile settings to the VPN client.
- Create a connection.
download and install the Azure VPN Client
Use the following steps to download and install the latest version of the Azure VPN Client for Linux.
# install curl utility
sudo apt-get install curl

# Install Microsoft's public key
curl -sSl https://packages.microsoft.com/keys/microsoft.asc | sudo tee /etc/apt/trusted.gpg.d/microsoft.asc

# Install the production repo list for focal
# For Ubuntu 20.04
curl https://packages.microsoft.com/config/ubuntu/20.04/prod.list | sudo tee /etc/apt/sources.list.d/microsoft-
ubuntu-focal-prod.list

# Install the production repo list for jammy
# For Ubuntu 22.04
curl https://packages.microsoft.com/config/ubuntu/22.04/prod.list | sudo tee /etc/apt/sources.list.d/microsoft-
ubuntu-jammy-prod.list

sudo apt-get update
sudo apt-get install microsoft-azurevpnclient
To configure your Azure VPN Client profile, you download a VPN Client profile configuration package from the Azure P2S gateway. This package contains the necessary settings to configure the VPN client.
If you used the P2S server configuration steps as mentioned in the prerequisite section, you’ve already generated and downloaded the VPN client profile configuration package that contains the VPN profile configuration files you’ll need. If you need to generate configuration files, see Download the VPN client profile configuration package.
If your P2S gateway configuration was previously configured to use the older, manually registered App ID versions, your P2S configuration doesn’t support the Linux VPN client. See About the Microsoft-registered App ID for Azure VPN Client.
Locate and extract the zip file that contains the VPN client profile configuration package. The zip file contains the AzureVPN folder. In the AzureVPN folder, you’ll see either the azurevpnconfig_aad.xml file, or the azurevpnconfig.xml file, depending on whether your P2S configuration includes multiple authentication types. The .xml file contains the settings you use to configure the VPN client profile.
Modify profile configuration files
If your P2S configuration uses a custom audience with your Microsoft-registered App ID, you might receive error message aadsts650057 when you try to connect. Retrying authentication usually resolves the issue. This happens because the VPN client profile needs both the custom audience ID and the Microsoft application ID. To prevent this, modify your profile configuration .xml file to include both the custom application ID and the Microsoft application ID.
Note
This step is necessary for P2S gateway configurations that use a custom audience value and your registered app is associated with the Microsoft-registered Azure VPN Client app ID. If this doesn’t apply to your P2S gateway configuration, you can skip this step.
-
To modify the Azure VPN Client configuration .xml file, open the file using a text editor such as Notepad.
-
Next, add the value for applicationid and save your changes. The following example shows the application ID value for
c632b3df - fb67 - 4d84 - bdcf - b95ad541b5c8.Example
<aad>
   <audience>{customAudienceID}</audience>
   <issuer>https://sts.windows.net/{tenant ID value}/</issuer>
   <tenant>https://login.microsoftonline.com/{tenant ID value}/</tenant>
   <applicationid>c632b3df - fb67 - 4d84 - bdcf - b95ad541b5c8</applicationid>
</aad>
Import client profile configuration settings
In this section, you configure the Azure VPN client for Linux.
-
Onthe Azure VPN Client page , selectImport.
-
Select Import Profile and browse to find the profile xml file . select the file . With the file select , selectOK.
-
View the connection profile information. Change the Certificate Information value to show the default DigiCert_Global_Root G2.pem or DigiCert_Global_Root_CA.pem. Don’t leave blank.
-
If your VPN client profile contains multiple client authentications, for Client Authentication, Authentication Type select the option for Microsoft Entra ID.
-
For the Tenant field, specify the URL of your Microsoft Entra Tenant. Make sure the Tenant URL doesn’t have a
\(backslash) at the end. Forward slash is permissible.The Tenant ID has the following structure:
https://login.microsoftonline.com/{Entra TenantID} -
For the Audience field, specify the Application ID (App ID).
The App ID for Azure Public is:
c632b3df - fb67 - 4d84 - bdcf - b95ad541b5c8. We also support custom App ID for this field. -
For the Issuer field is specify , specify the url of the Secure Token Service . include a trail slash at the end of the issuer value . Otherwise , the connection is fail might fail .
Example:
https://sts.windows.net/{AzureAD TenantID}/ -
When the fields are filled in, click save.
-
In the VPN connection pane, select the connection profile that you saved. Then, from the dropdown, click Connect.
-
The web browser automatically appears. Fill in the username/password credentials for Microsoft Entra ID authentication, then connect.

-
If the connection is completed successfully, the client shows a green icon and the Status Logs window shows Status = Connected.
-
Once connected, the status changes to Connected. To disconnect from the session, from the dropdown, select Disconnect.
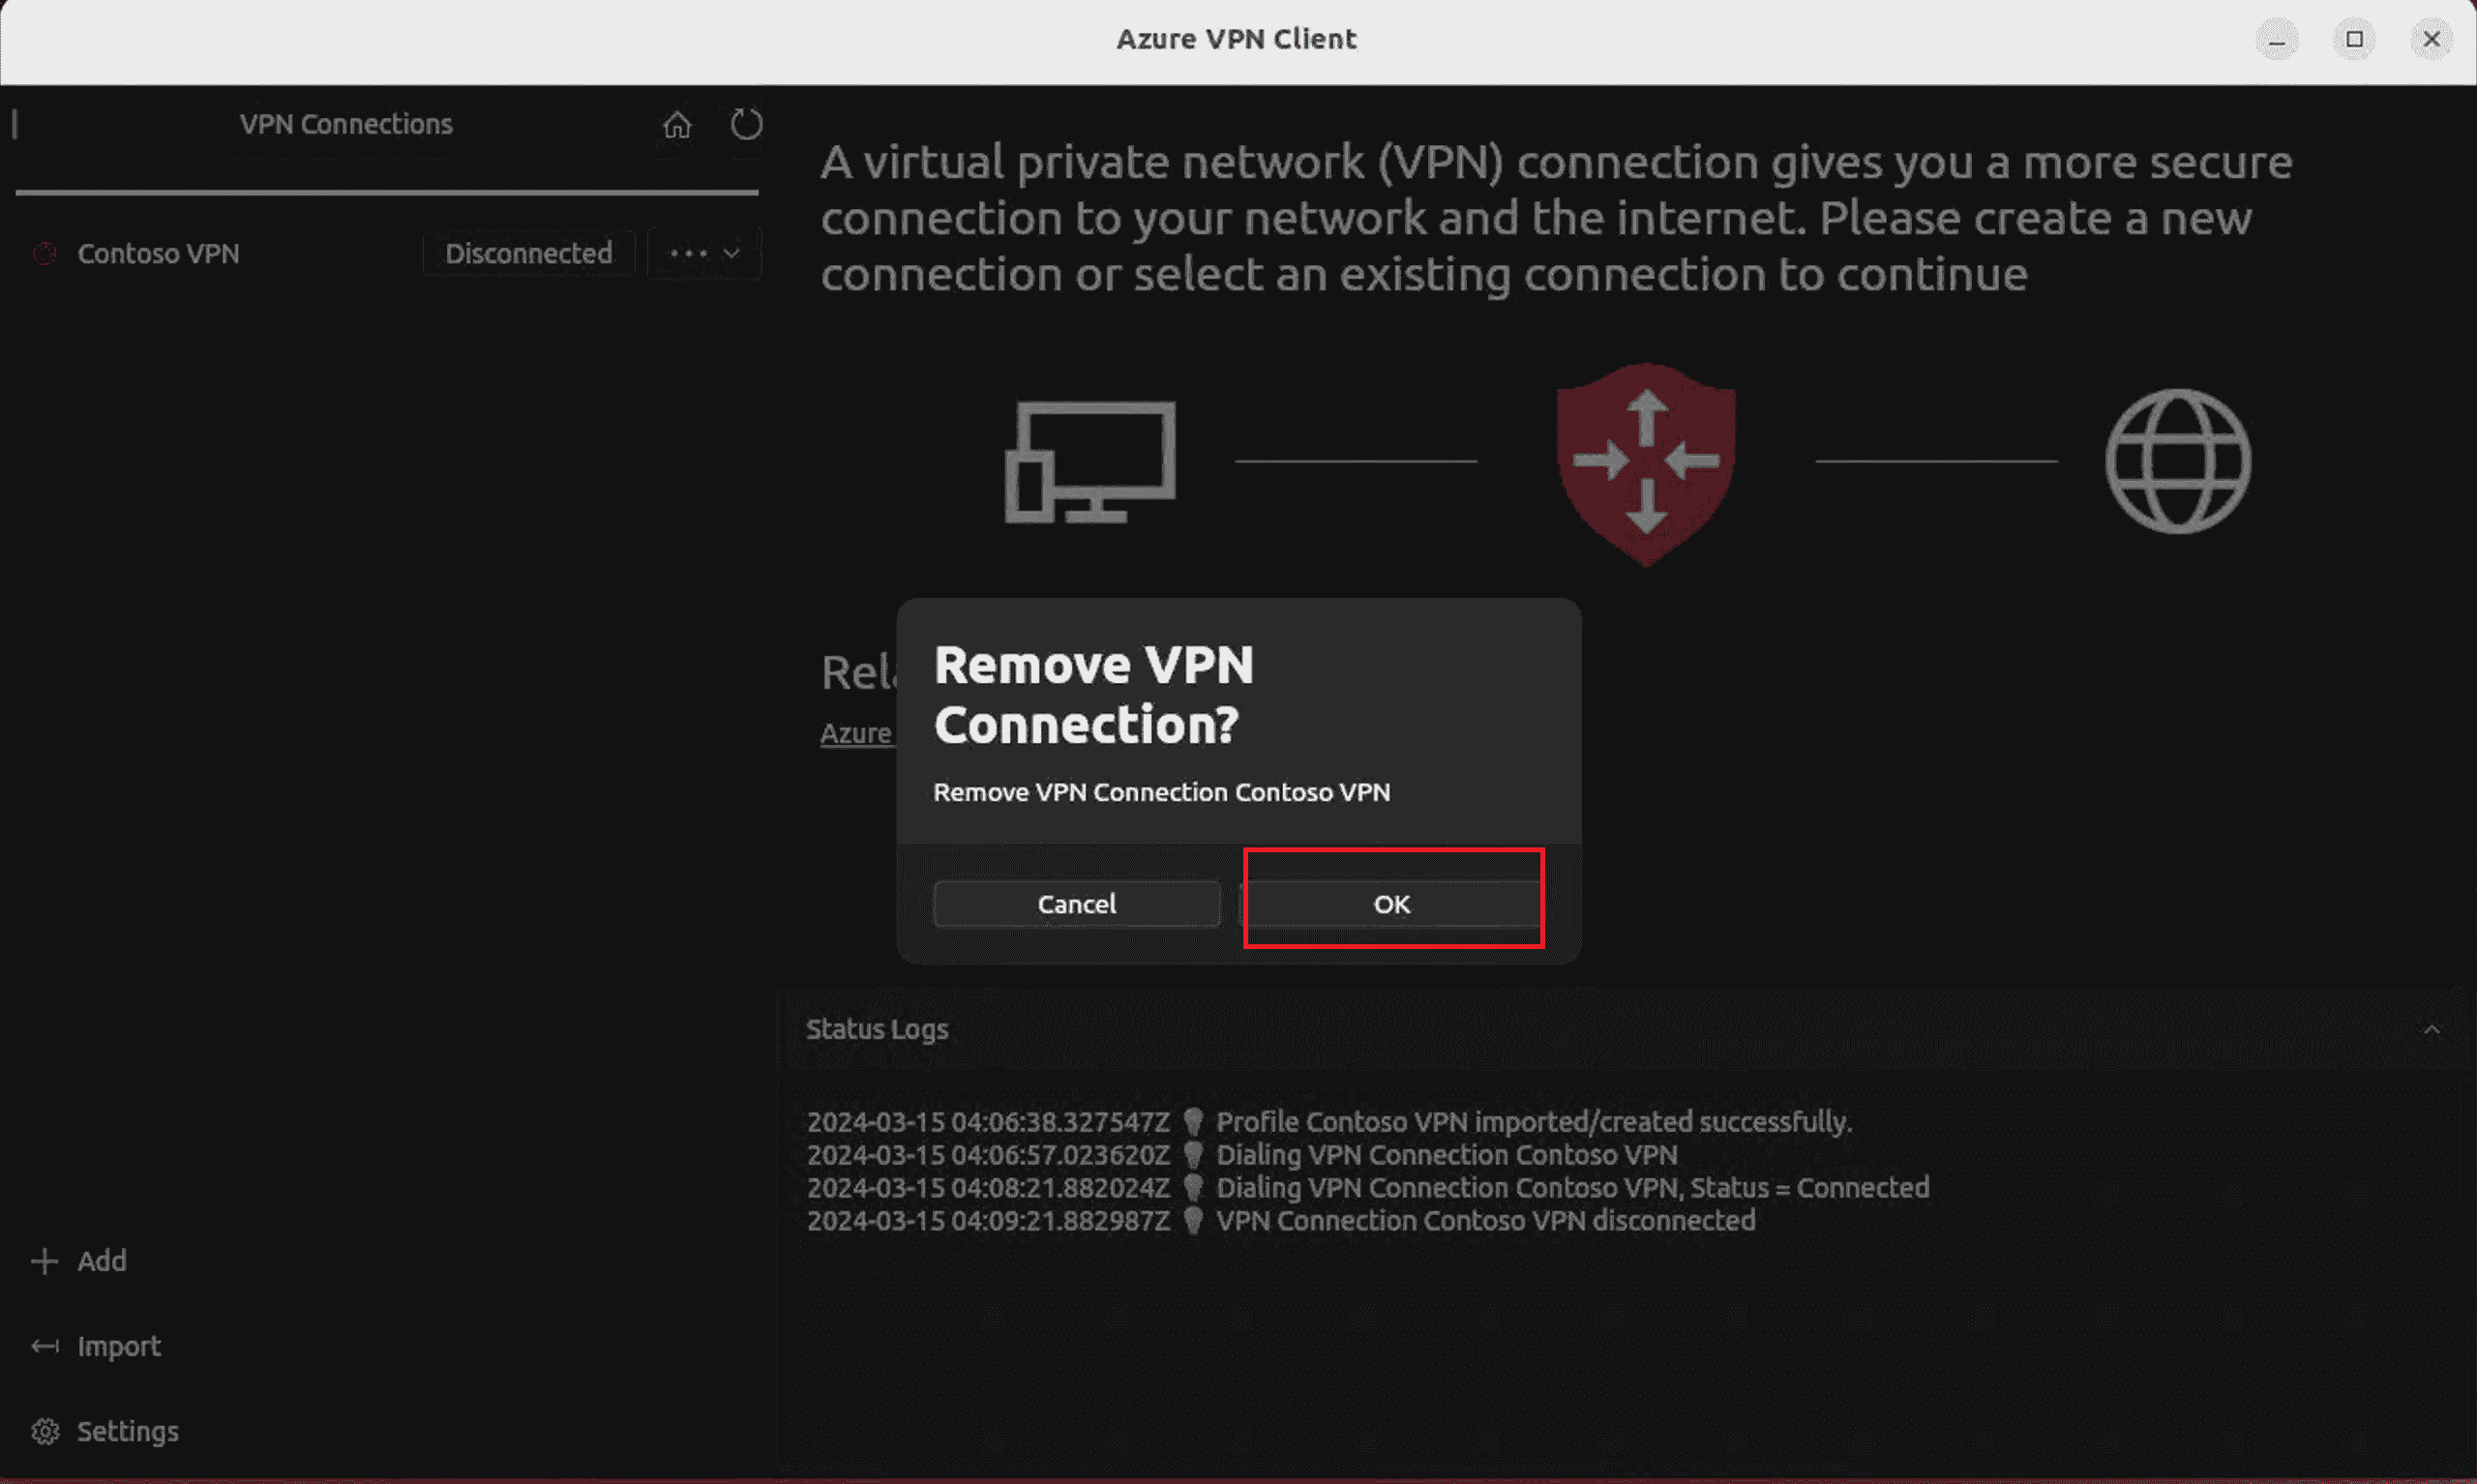
Delete a VPN client profile
-
Onthe Azure VPN client , select the connection you want to remove . Then , from the dropdown , selectremove.
-
Onremove VPN Connection?, select OK.
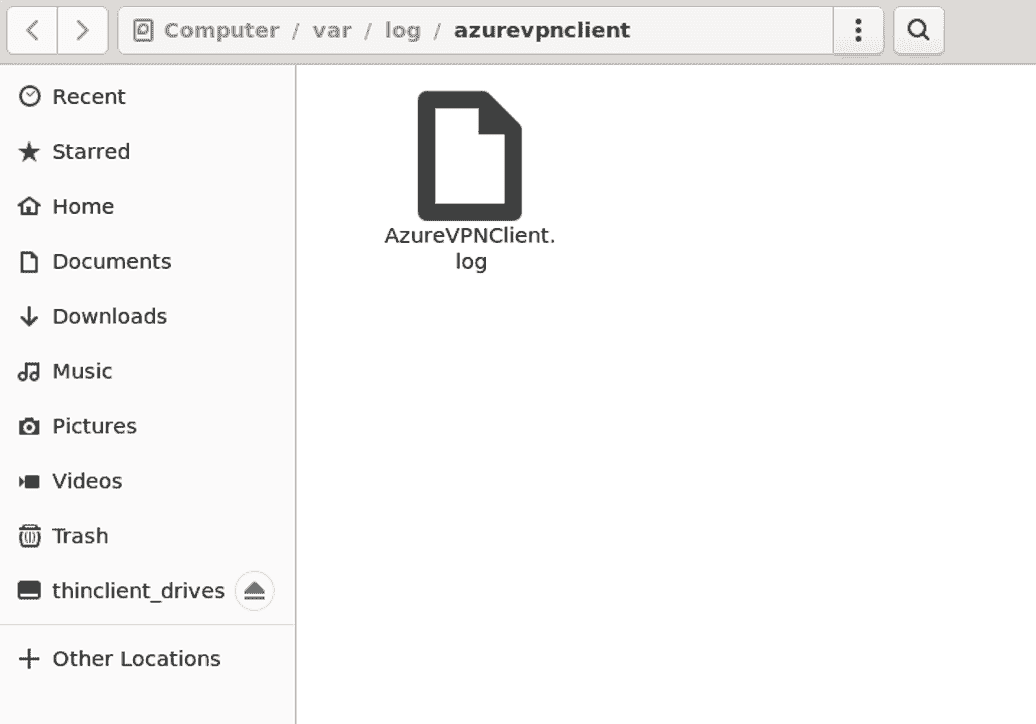
check log
To diagnose issue , you is use can use the Azure VPN ClientLogs.
-
In the Azure VPN Client, go to setting. In the right pane, select Show Logs Directory.

-
To access the log file, go to the /var / log / azurevpnclient folder and locate the AzureVPNClient.log file.